View or comment on this project log on Hackaday.io
Since the last time I had a board made, I've discovered several revisions that I needed to make:
- The 5V boost of the bq25895 cuts out long enough to shut off the Pi when you connect USB power.
- I needed extra lanes of DSI going from the CM4 to the SN65DSI83 chip in order for all the clock rates to fall within the ranges allowed by the SN65 and the iPad's display.
- The footprints for my touchscreen FFCs were backwards
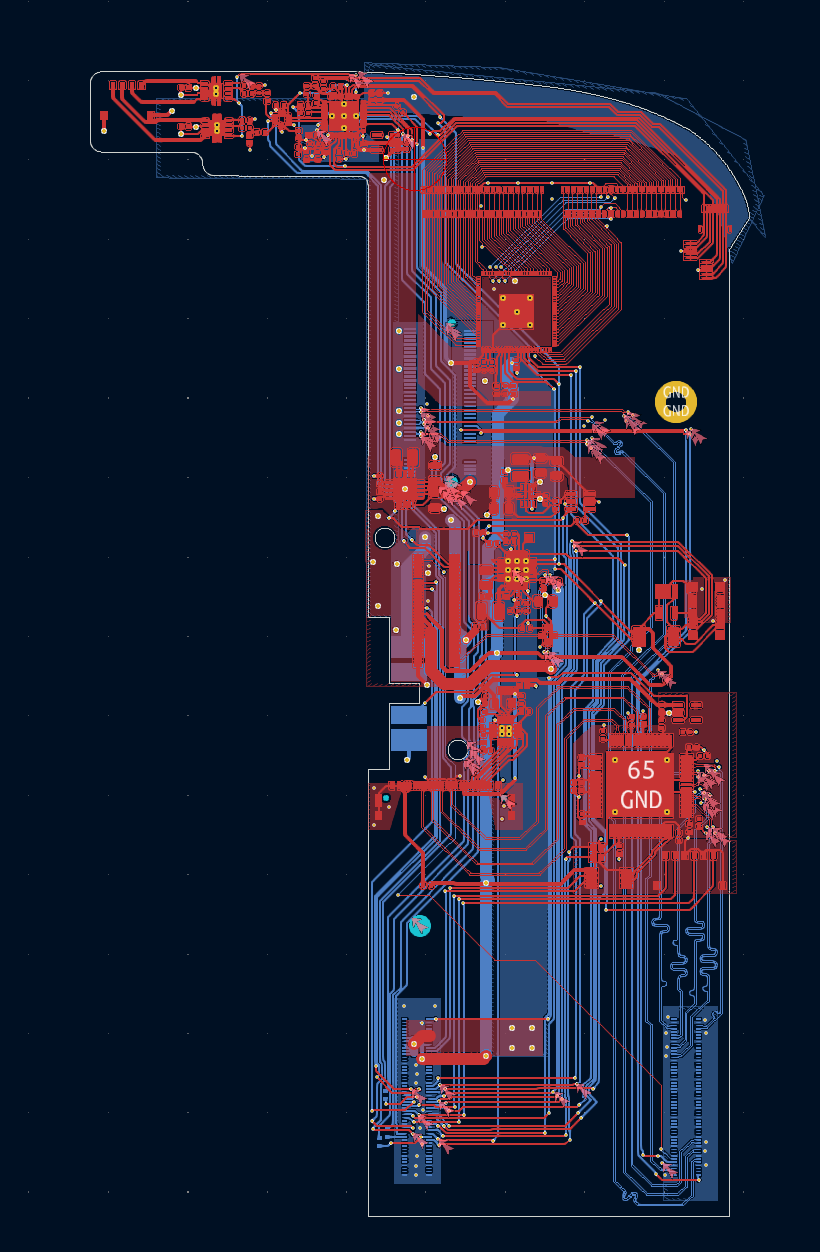
I took this opportunity to design a version of the board where I actually used the CM4 instead of having separate 40-pin connector / FFC for DSI / USB port on the board. I threw an M.2 slot on there for NVMe support, as well.
When I was nearly finished with that design, I learned about the Radxa CM3, which is the same form factor as the Raspberry Pi CM4 but has a third board-to-board connector providing several features that would be quite convenient for this application:
- Audio codec with headphone out, mono speaker out, and microphone in
- Battery charger
- Power button handling
- Native LVDS support on the DSI0 pins (and the extra DSI0 pins are broken out)
- HDMI pins can also output DisplayPort (the dock connector on the iPad can speak DisplayPort, which is used to drive the 30-pin to HDMI adapter.)
In addition, the Rockchip RK3566 that the Radxa CM3 is built around actually seems to have the ability to sleep, which is especially important on a tablet. On the CM4, I'll have to suspend to disk or just shut down or something.
I think if I the Radxa CM3 had existed when I started this project, I might've chosen it over the Pi CM4, as it should require a lot less glue circuitry to make it work in this application. (I had originally considered the Pine64 SOPine and the Nvidia Jetson Nano, but I think I excluded these because the SO-DIMM connectors that they require wouldn't fit between the case and the screen.) As a bonus, the RK3566 is less tall than the BCM2711, which may buy me a little vertical room, depending on the other components on the CM3.
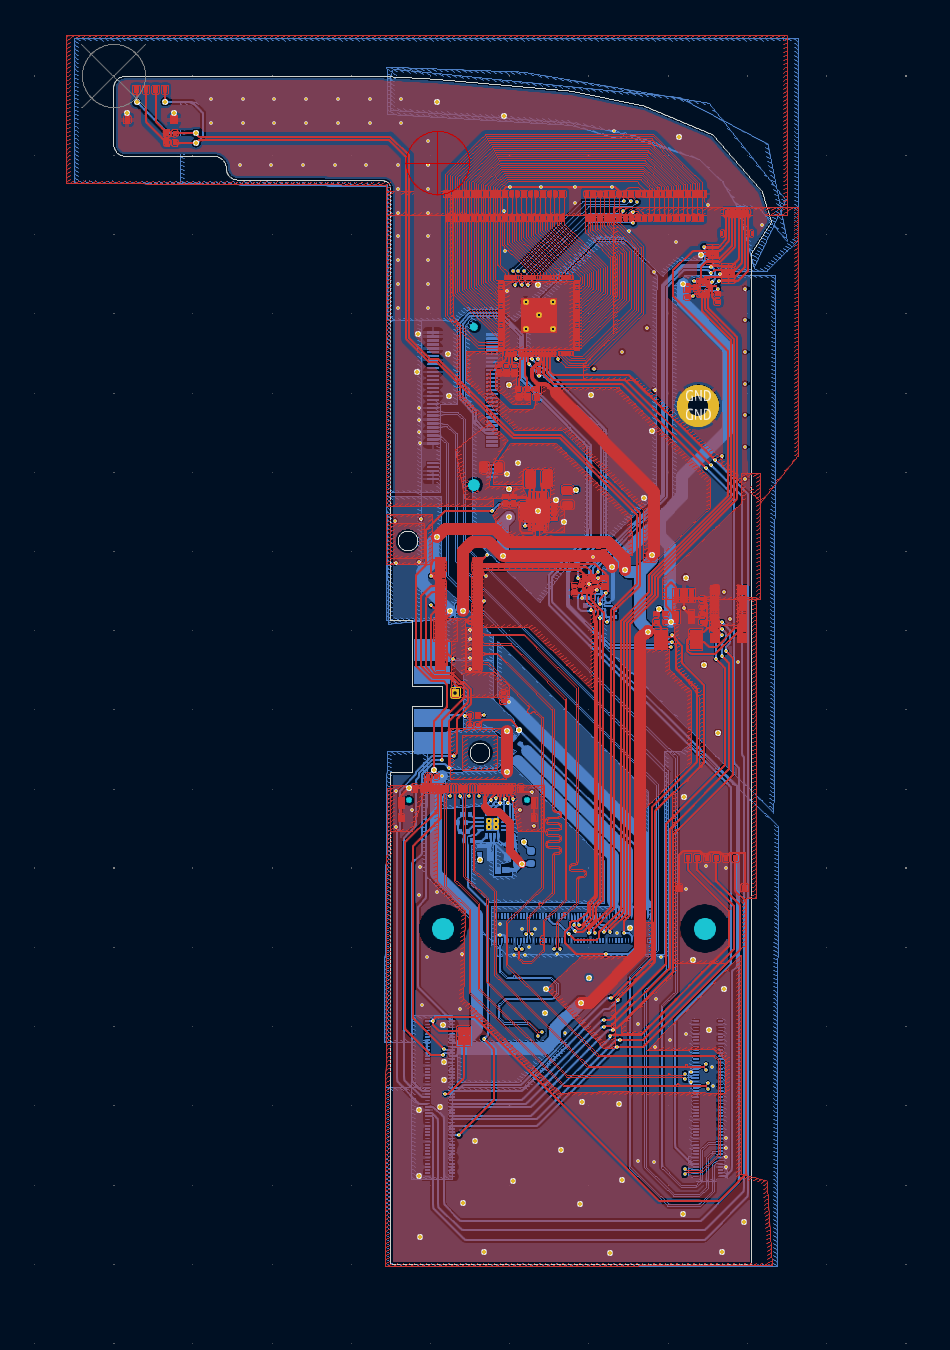
I've also designed a version of my board based around the Radxa CM3. Once I figured out the position and orientation of the third connector on the CM3, this wasn't too bad -- it has far fewer components than the CM4 version of the board. It's essentially just connectors, the touchscreen controller, a buck-boost converter for the NVMe slot, and some audio switches.
Since the Radxa CM3 / RK3566 clearly has less software support than the Pi (I think as of the time of writing, you can't even get HDMI output, let alone LVDS.), I'm planning to hedge my bets and have both boards made.